
Breeding
How to Breed Isopods
Introduction: Can You Breed Isopods at Home?
Yes. Many terrestrial isopods can reproduce in captivity, which makes them rewarding animals for hobbyists who enjoy maintaining colonies and observing small ecosystems.
Once you establish the right conditions, you may eventually notice tiny juveniles moving among the leaf litter. Over time, these young isopods grow, molt, and become part of the adult population.
Successful breeding is not simply a matter of placing several isopods in a container. Your colony needs suitable environmental conditions, appropriate nutrition, and enough space to develop.
This guide explains how to establish a breeding colony, encourage healthy reproduction, and avoid common mistakes.
Step 1: Choose a Species Suitable for Your Goals
Before starting a breeding project, decide which species you want to raise.
Some species commonly kept in captivity can reproduce readily under suitable conditions. Others may have more demanding requirements or grow more slowly.
Consider the following before buying:
- How well documented the species' care requirements are.
- Whether it is suitable for your experience level.
- Its moisture and temperature preferences.
- How quickly the colony may grow.
- Whether you intend to keep, display, or eventually sell offspring.
If you are a beginner, a well-documented species from a reputable captive-bred source is generally a sensible starting point.
Avoid purchasing a rare variety solely because it is attractive. First confirm that you can maintain the conditions required by that particular colony.
Step 2: Start With a Healthy Colony
A breeding colony needs sexually mature animals capable of reproduction. Buying a group of juveniles may mean waiting until they mature.
The appropriate starting number depends on the species, enclosure, the seller's offering, and your budget. A larger starting group may give you more opportunities for successful reproduction, but it does not guarantee faster colony growth.
When buying, ask the seller about:
- The species and variety.
- The approximate age or maturity of the colony.
- The current care conditions.
- The food and substrate being used.
- Any acclimation recommendations.
A healthy starter colony with reliable care information is more useful than a larger group that arrives in poor condition.
Step 3: Prepare the Breeding Enclosure
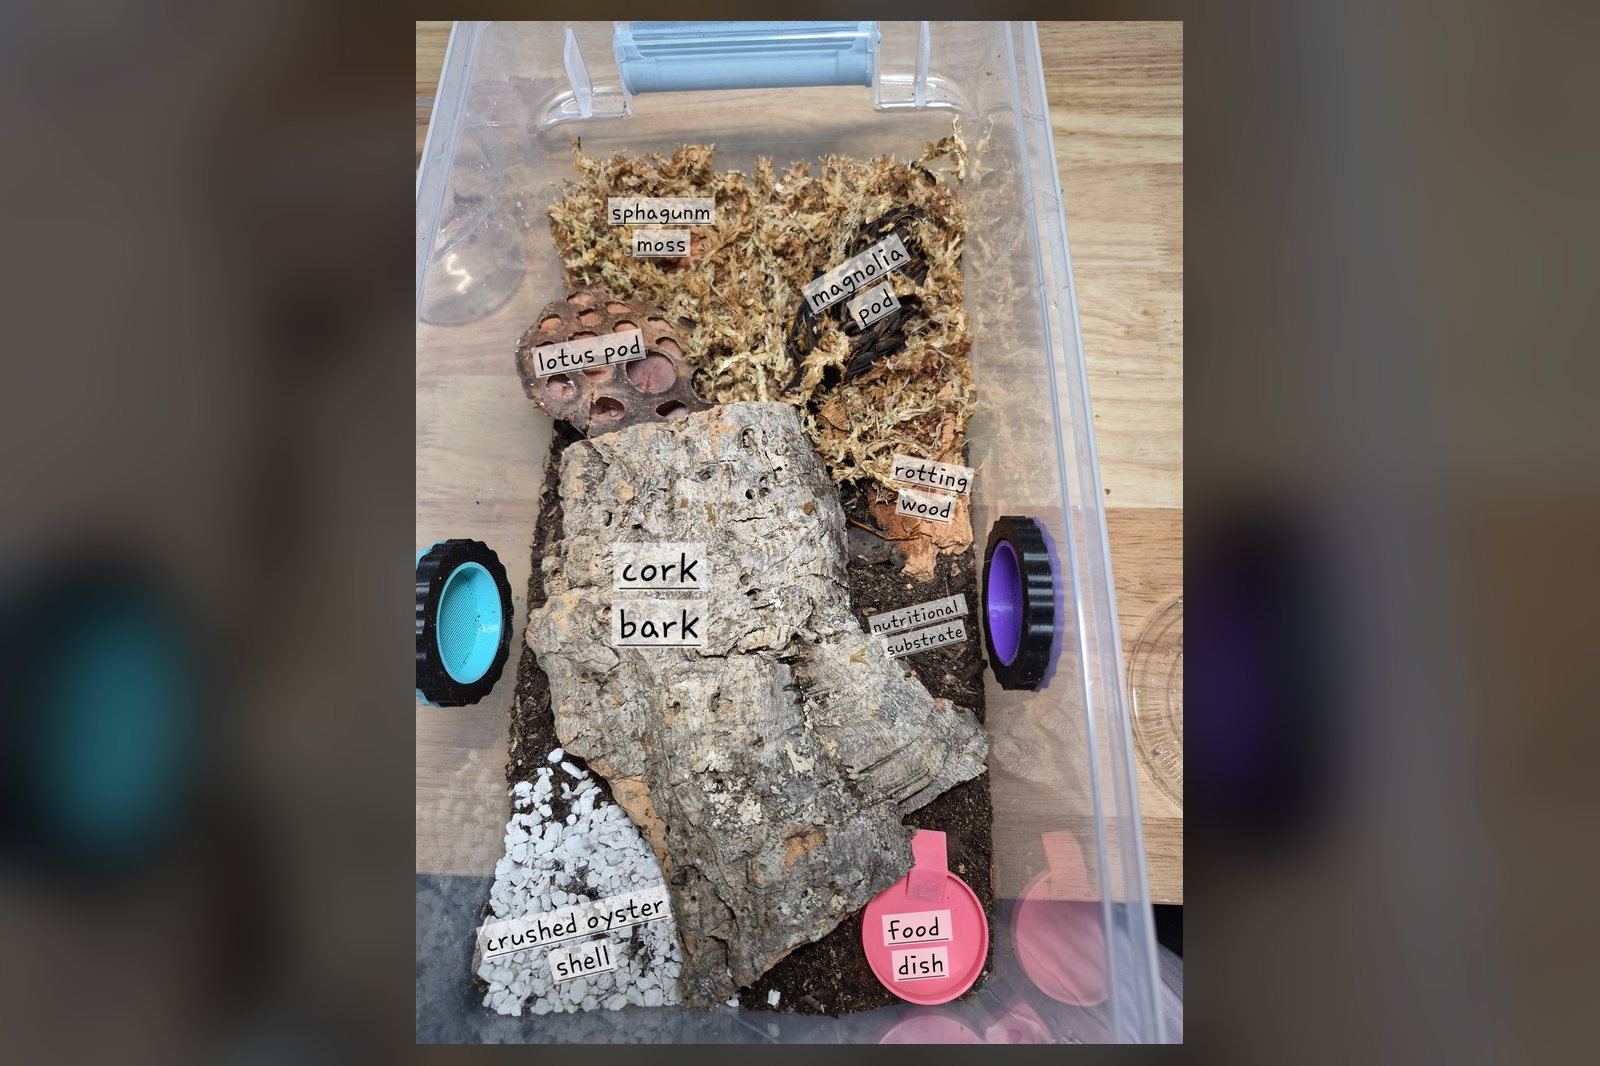
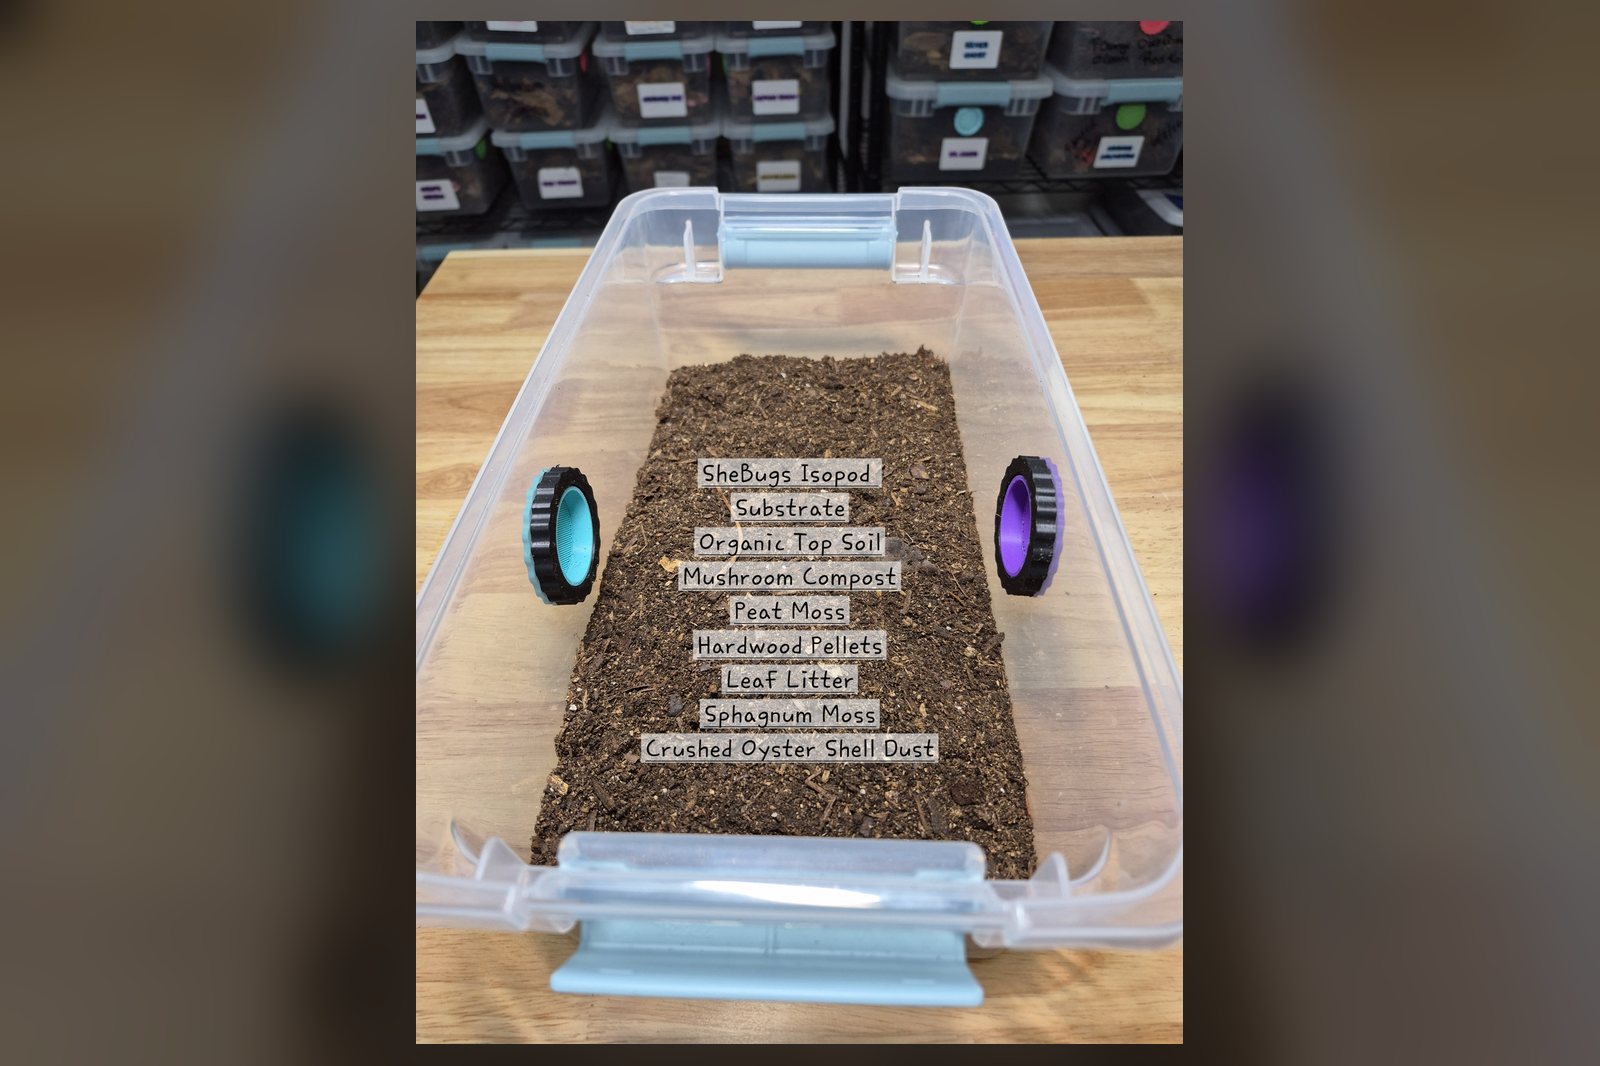
Before introducing the animals, establish an enclosure that meets their needs.
Depending on the species, this may include:
- A secure container with suitable ventilation.
- Appropriate substrate.
- Leaf litter.
- Safe hiding places such as suitable bark.
- A moisture gradient, where appropriate.
- Suitable food and a calcium source.
Do not assume that every species needs the same substrate depth or moisture level. Use care information specific to the colony.
The enclosure should also be easy to maintain without repeatedly disturbing the animals.
Why Leaf Litter Matters
For many terrestrial species, suitable leaf litter provides food and shelter.
It also creates a surface environment where young isopods can hide and feed. Maintain an appropriate supply as the colony grows and consumes the material.
Step 4: Maintain Suitable Moisture and Temperature
Environmental stability is important for breeding.
If the enclosure becomes too dry, many terrestrial isopods can become dehydrated. Excessive moisture may also create unsuitable conditions, especially when airflow is poor.
For species that benefit from a moisture gradient, provide a more consistently moist zone alongside a comparatively drier area.
Temperature should remain within the range appropriate for the species. Avoid direct sunlight and rapid fluctuations.
Do not try to accelerate breeding by raising the temperature beyond the species' suitable range. Excessive heat can stress or kill the colony.
Step 5: Feed the Colony Properly
A breeding colony needs suitable nutrition to support normal growth and reproduction.
For many terrestrial species, the foundation of the diet includes:
- Appropriate leaf litter.
- Suitable decomposing hardwood where relevant.
- Supplemental food appropriate to the species.
- A suitable calcium source.
Some species and colonies may benefit from additional protein in their supplemental diet. The amount and frequency depend on the species and established husbandry guidance.
Offer modest amounts of fresh food and remove uneaten portions before they decay excessively.
More food does not automatically mean more babies. Appropriate environmental conditions and balanced care remain essential.
Step 6: Understand How Isopods Reproduce
Many terrestrial isopods reproduce sexually, with females carrying developing offspring in a specialized brood pouch called a marsupium.
The pouch provides a protected environment for development. When the young are released, they resemble small versions of the adults, although their bodies are still developing.
Young isopods grow through successive molts.
Because reproduction and development vary among species, you should not expect every colony to produce babies on the same schedule.
How Can You Tell If Your Isopods Have Babies?
You may notice tiny, pale or lightly colored juveniles beneath leaf litter, bark, or other cover.
They can be difficult to see at first, particularly in an enclosure with a deep layer of substrate.
Other signs of a growing colony may include more frequent sightings or an increase in the number of animals gathering around food.
Avoid digging through the entire enclosure repeatedly to search for juveniles. They are delicate, and excessive disturbance can interfere with normal colony activity.
Step 7: Give the Colony Time to Grow
One of the most common mistakes new breeders make is expecting rapid results.
Even species known for productive colonies need time to mature and reproduce. A small starter group may take a while to establish, particularly if it contains immature individuals.
During this period:
- Maintain suitable conditions consistently.
- Keep appropriate food available.
- Avoid unnecessary enclosure changes.
- Monitor the colony without disturbing it excessively.
- Allow juveniles time to grow.
Population growth may be uneven. A colony can appear quiet for a while before you begin noticing more young animals.
Step 8: Avoid Overcrowding
A successful colony can eventually outgrow its original enclosure.
As numbers increase, monitor food availability, moisture, space, and the general condition of the substrate.
If the enclosure becomes crowded or difficult to maintain, consider moving part of the colony into a prepared secondary enclosure.
Make sure the new enclosure is suitable before transferring animals. Do not divide a colony simply because you have not seen every individual recently.
Step 9: Keep Different Species Separate
If you are breeding multiple varieties, maintaining separate enclosures is generally the simplest and safest approach.
Mixing species can introduce several complications:
- Different environmental requirements.
- Competition for food and hiding places.
- Difficulty tracking population growth.
- Potential loss of a distinct breeding line.
- Uncertainty about the identity of offspring.
If you are maintaining a particular color variety, keep accurate labels and records.
This is especially important for anyone considering selling captive-bred isopods.
Step 10: Keep Basic Breeding Records
Even a small breeding project can benefit from simple records.
Track the species, source, acquisition date, enclosure setup, feeding routine, and notable changes in population.
You can also record when juveniles first appear and when you divide a colony.
These records help you recognize patterns and identify which conditions are working well.
For commercial breeders, accurate identification and clear records are particularly important for maintaining customer confidence.
Common Isopod Breeding Mistakes
Changing conditions too frequently. Repeatedly adjusting moisture, temperature, and substrate makes it harder to establish stable conditions.
Overfeeding. Uneaten food can spoil and create enclosure problems.
Disturbing juveniles. Frequent digging and handling can damage small animals.
Expecting every species to reproduce at the same rate. Reproductive patterns vary among species and conditions.
Overcrowding the enclosure. Colony growth requires a plan for maintaining adequate space and food.
Ignoring species identification. Accurate identification helps ensure the correct care requirements are being followed.
Frequently Asked Questions
How long does it take to breed isopods?
The time required depends on the species, maturity of the starting colony, and environmental conditions. Some colonies may produce visible juveniles relatively quickly, while others take longer to establish.
Do I need male and female isopods?
Many commonly kept terrestrial isopods reproduce sexually, so a sexually reproducing colony needs both sexes. Some species can reproduce through other mechanisms, but you should not assume this applies to your species without reliable evidence.
How many isopods should I start with?
The ideal number depends on the species, maturity of the animals, enclosure size, and your goals. Ask the seller for a recommended starter group for the particular variety.
Do isopods need special breeding food?
Not necessarily. Many species can reproduce with appropriate leaf litter, suitable substrate, and a balanced supplemental diet. Additional foods should be chosen according to the species' needs.
Can I breed isopods in a small container?
Some starter colonies can be maintained in relatively compact enclosures, but the container must provide suitable environmental conditions and enough space for the colony to develop. Plan for expansion as numbers increase.
Why are my isopods not reproducing?
Possible factors include immature animals, a small colony, unsuitable moisture or temperature, inadequate nutrition, stress, or species-specific reproductive patterns. Review husbandry before making major changes.
Conclusion: Build a Stable Colony First
Successful isopod breeding begins with a healthy starter group, a suitable enclosure, appropriate food, and consistent environmental conditions.
Give the colony time to establish itself, monitor its development, and make changes based on observed needs rather than trying to force faster reproduction.
Ready to start a breeding project? Explore the isopods in the shop and choose a species with care requirements that fit your experience and setup. A healthy captive-bred starter colony is a practical foundation for learning the hobby.
In the shop
Priced per isopod. These are the closest matches currently listed, not a promise that every variety in the article is for sale.